Appearance
Classes & Organization
A class is the main teaching container. It connects instructors, students, units, lessons, schedules, and submissions.
Who Can Manage Classes
Class access depends on role and assignment.
| Role | Typical class access |
|---|---|
| Super user | Can access classes across organizations. |
| Organization admin | Can manage classes in the organization. |
| Instructor admin | Can manage organization classes and instructor assignments. |
| Instructor | Can access assigned classes. |
If a class is missing from your list, check whether you are assigned to it and whether the list is filtered to deleted classes.
Open the Class List
There are two common ways to find classes:
- Use My Classes when you are an instructor or instructor admin looking for assigned work.
- Use Organization -> Classes when you have organization-management access.
The class list supports:
- Filtering by Class Name.
- Showing deleted classes with Show Deleted.
- Pagination for large organizations.
- Opening a class by selecting its row.
Create a Class
Classes are created from the organization class list.
- Open the organization's Classes page.
- Select Add Class.
- Enter Class Name.
- Select one or more instructors in Assign Instructors.
- Select Create.
The class name is required and can be up to 255 characters. At least one instructor is required.
INFO
The instructor picker only shows active instructor accounts that have completed password setup. If an instructor is missing, check the user account before creating the class.
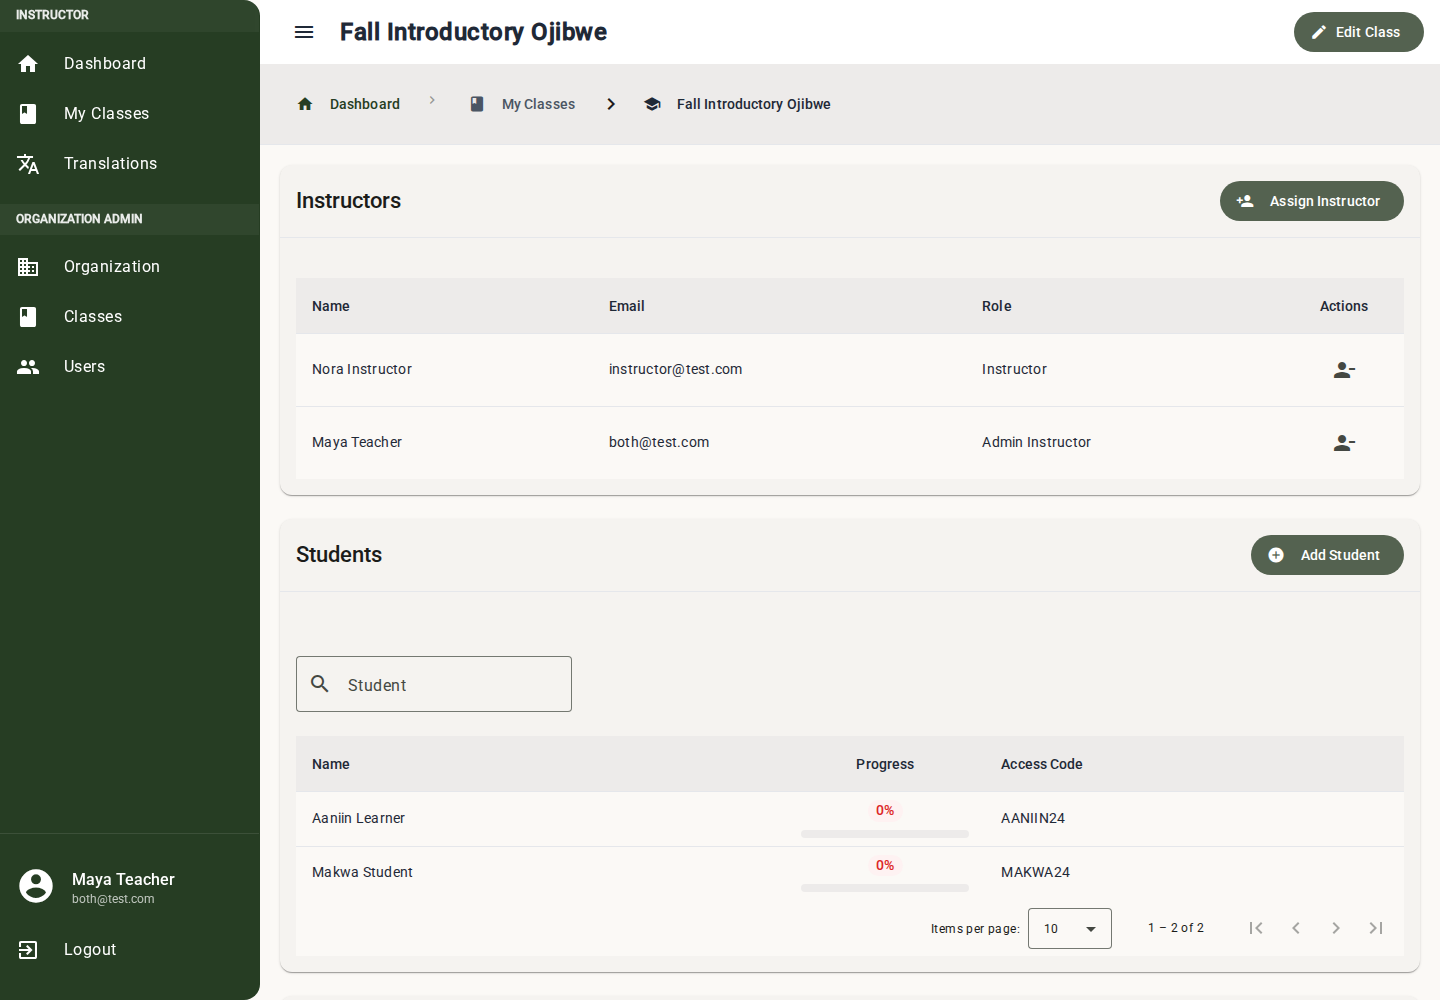
Class Detail Page
Open a class row to reach the class detail page. This page brings together the class workflow:
| Section | Use it for |
|---|---|
| Class Instructors | View and manage instructor assignments when your role allows it. |
| Students | Add students, search the roster, view access codes, and open student profiles. |
| Units | Build the curriculum hierarchy and open lessons. |
| Class Schedule Calendar | Review and adjust lesson availability and due dates. |
The class detail page also has Edit Class in the page header.
Edit a Class
- Open the class detail page.
- Select Edit Class.
- Update Class Name.
- Use Deleted if the class should be hidden from active student access.
- Select Save.
When a class is marked deleted, the edit dialog warns that students will not be able to access the class.
Delete Instead of Losing Context
Deleting a class is a soft-delete cleanup action. It hides the class from normal active views while preserving its history.
Use delete when:
- A term is over.
- Students should no longer access the class.
- You still want to preserve units, lessons, submissions, and history.
To view deleted classes later, enable Show Deleted in the class list.
Manage Instructors
Classes can have more than one instructor. Use the Class Instructors section on the class detail page when you need to add or remove instructors.
See Class Instructors for the detailed workflow and the rule that a class must keep at least one instructor.
Manage Students
Use the Students section on the class detail page to:
- Add students.
- Search by name or access code.
- Read completion progress.
- Open a student profile.
- Find the student's mobile app access code.
See Student Management for the full student workflow.
Manage Curriculum
Use the Units section to build the class curriculum. Units contain lessons, and lessons contain questions and information entries.
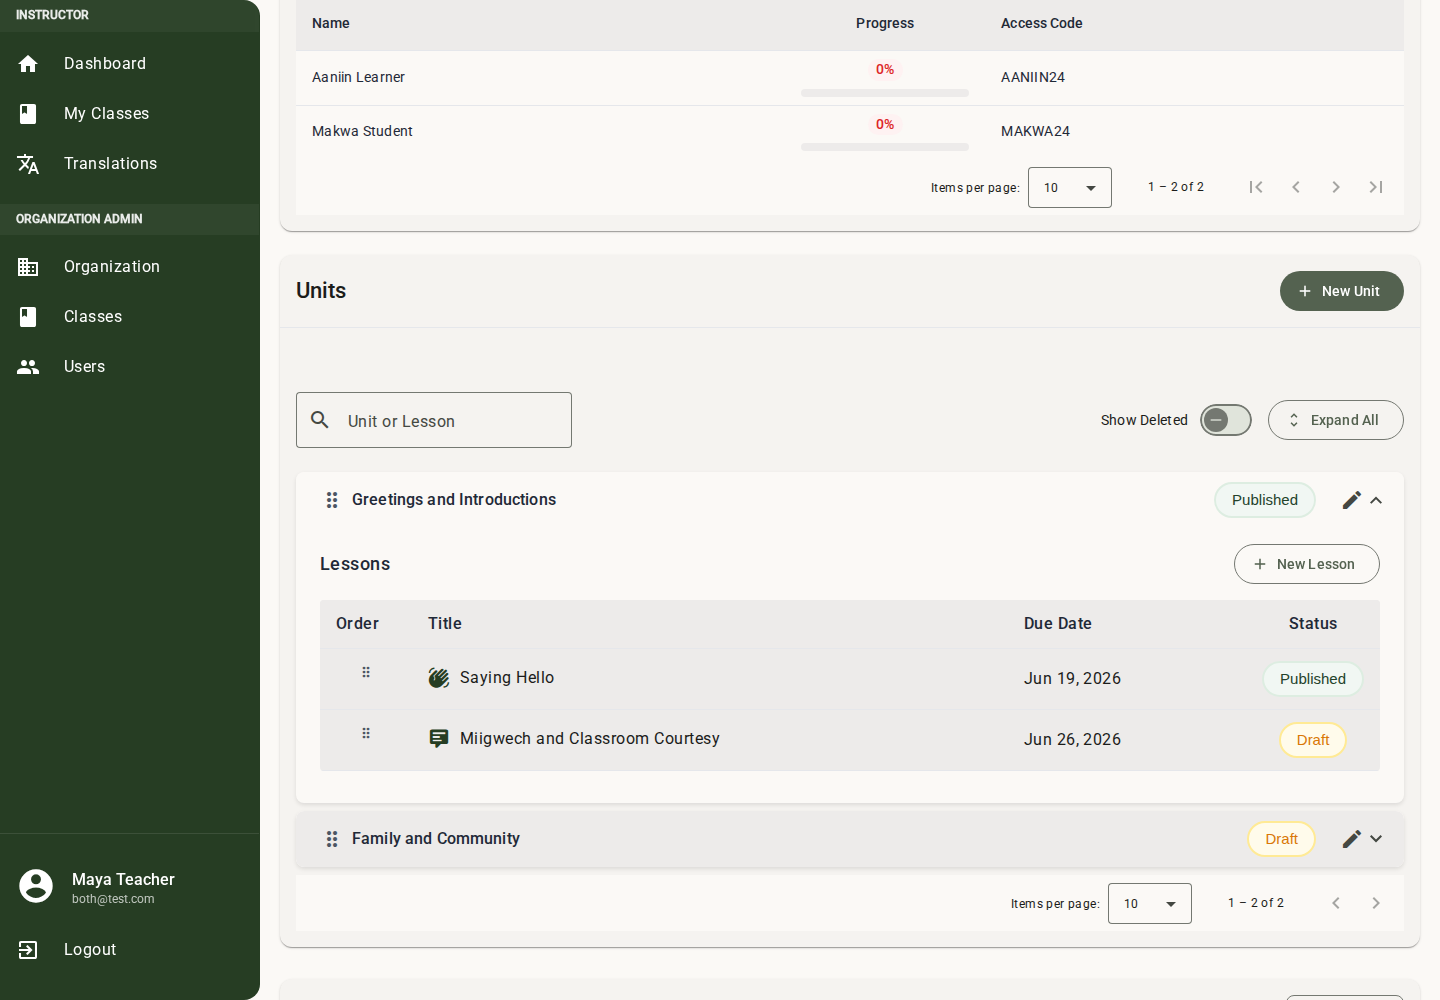
Common class-level curriculum tasks:
- Create units.
- Create lessons inside units.
- Reorder units and lessons.
- Publish or unpublish units and lessons.
- Open a lesson to edit content.
- Preview lesson or unit content.
See Curriculum & Content and Question Editors.
Schedule Lessons
The Class Schedule Calendar shows lesson dates using the organization timezone. Use it to check pacing and adjust scheduled lessons.
See Calendar & Scheduling for date behavior, timezone guidance, and scheduling details.
Recommended Setup Flow
- Create the class with at least one instructor.
- Add any co-instructors.
- Add students and distribute access codes.
- Create a first draft unit.
- Add lessons and content.
- Preview the lessons.
- Publish the unit and lessons when ready.
- Confirm lesson dates on the calendar.
Common Issues
Add Class is not available
You may not have permission to create classes. Ask an organization admin or instructor admin to check your role.
No instructors are available when creating a class
The picker only includes active instructors with completed password setup. Create or update instructor user accounts first.
A class is missing from My Classes
Check whether:
- The class is deleted.
- You are assigned as an instructor.
- You are viewing the correct organization.
Students cannot access the class
Check whether:
- The class is deleted.
- Students have the correct access codes.
- The class has published units and lessons.
- Lesson availability dates have passed.